Install RHEL for Edge on Compulab Fitlet2
---
 Posted by Andreas Stolzenberger
on October 13, 2021 ·
11 mins read
Posted by Andreas Stolzenberger
on October 13, 2021 ·
11 mins read
Contributors:
 Posted by Andreas Stolzenberger
on October 13, 2021 ·
11 mins read
Posted by Andreas Stolzenberger
on October 13, 2021 ·
11 mins read
.
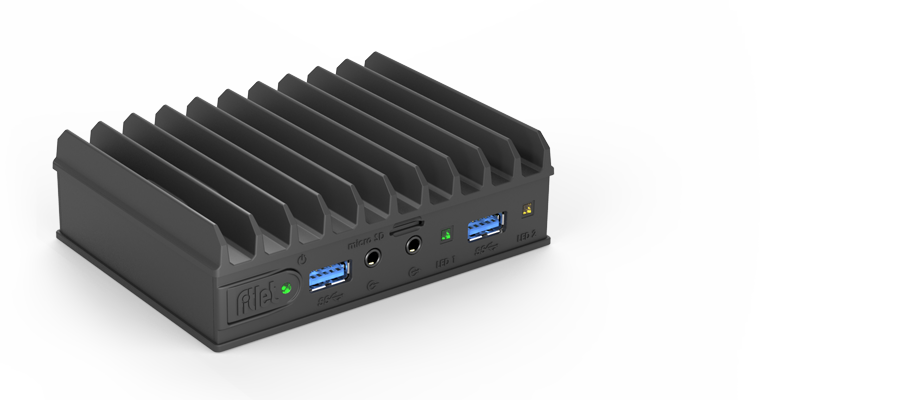
The next guide will show how to deploy RHEL for Edge to a physical miniature PC Fitlet2 manufactured by Compulab.
The solution of RHEL for Edge uses ostree to manage the packages to install on the device. Ostree is both a shared library and suite of command line tools that combines a “git-like” model for committing and downloading bootable filesystem trees, along with a layer for deploying them and managing the bootloader configuration.
For this use case we are providing a web server with the kickstart file required to start the installation, and hosting the repo with the required packages for this distribution, but we also provide the how to create your own from scratch with the tool image-builder available at the standard RHEL 8 distribution.
Model name |
fitlet2 |
CPU model name |
Intel® Atom x5-E3930 [CE3930] |
Memory capacity |
4.00 GiB |
Connect a USB-Keyboard and a Monitor to the Fitlet2.
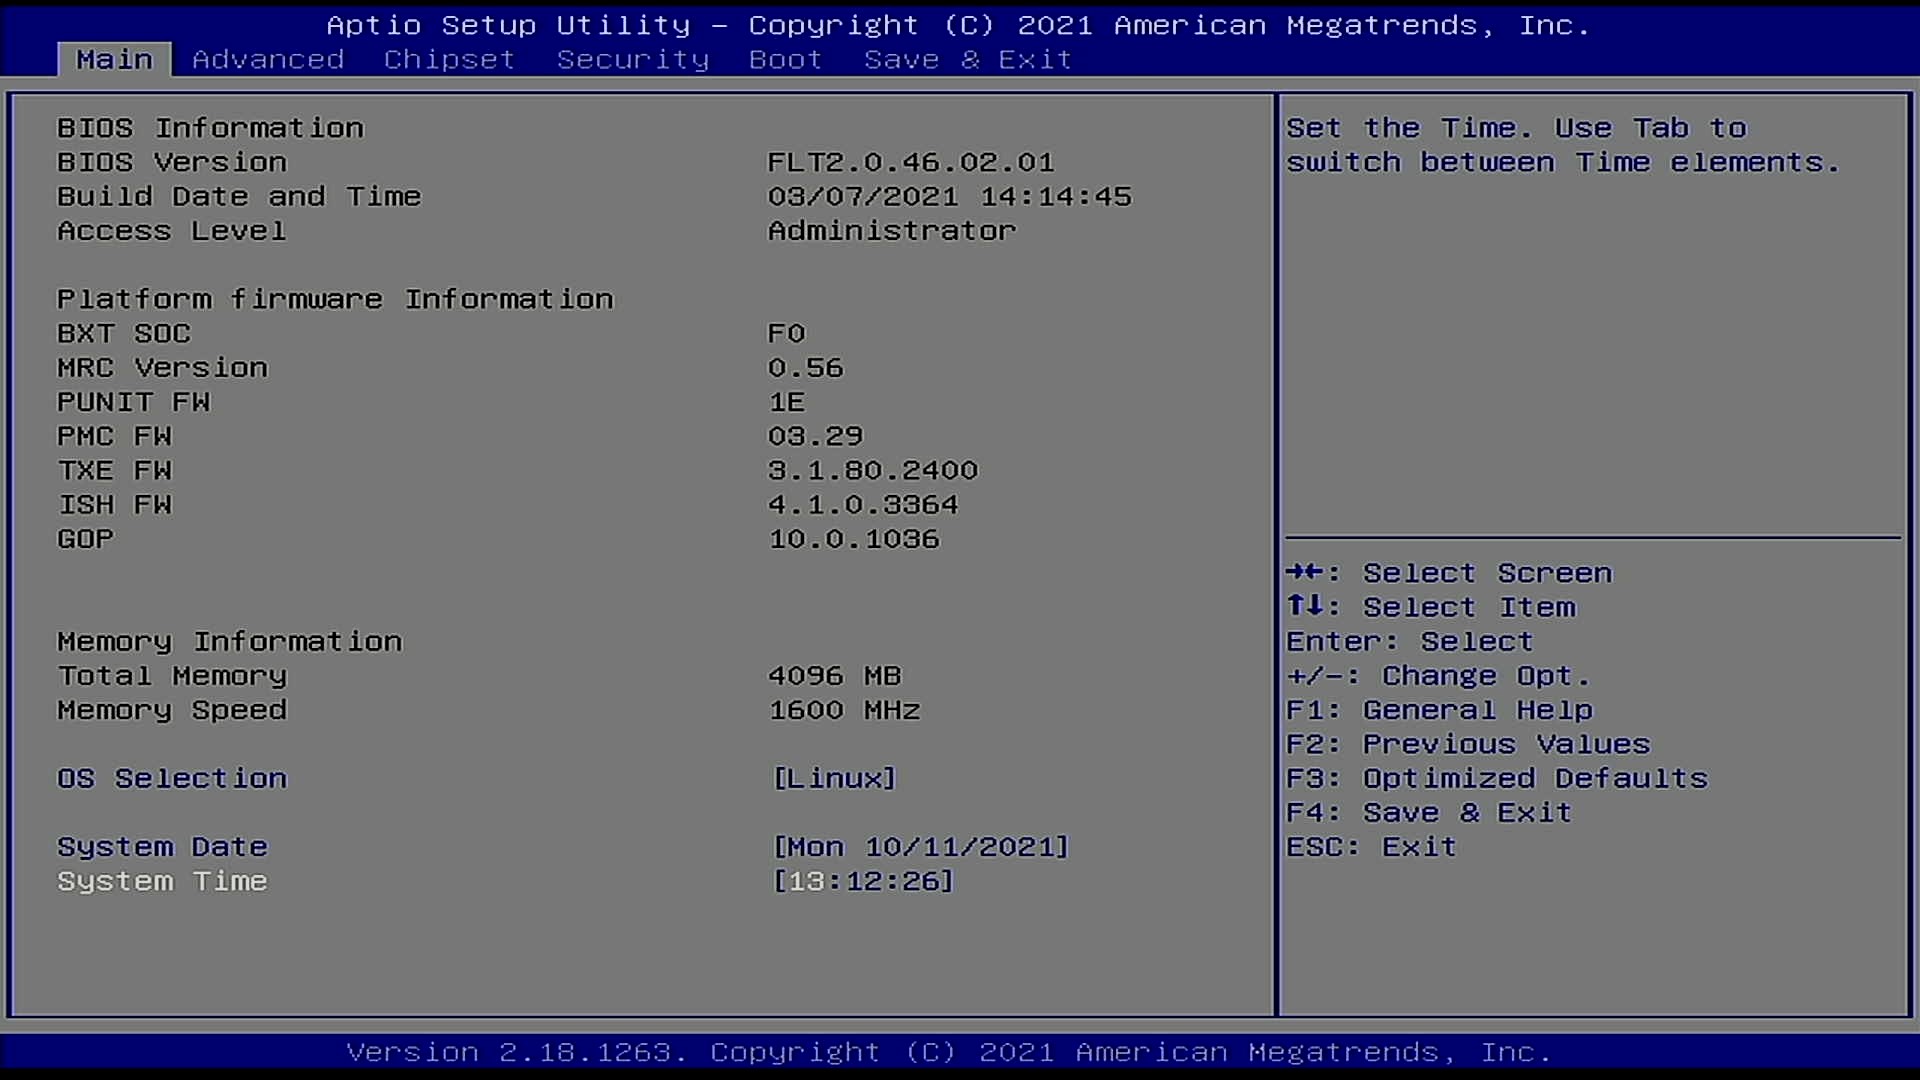
Switch the Device on.
It should automatically enter the BIOS.
If not, press “canc” during boot to enter the BIOS.
If necessary, adjust the Time and Date of the Machine. Use the UTC Timezone !
If the BIOS clock is way off, your Web-based Kickstart will fail with an SSL-Error (see further below)
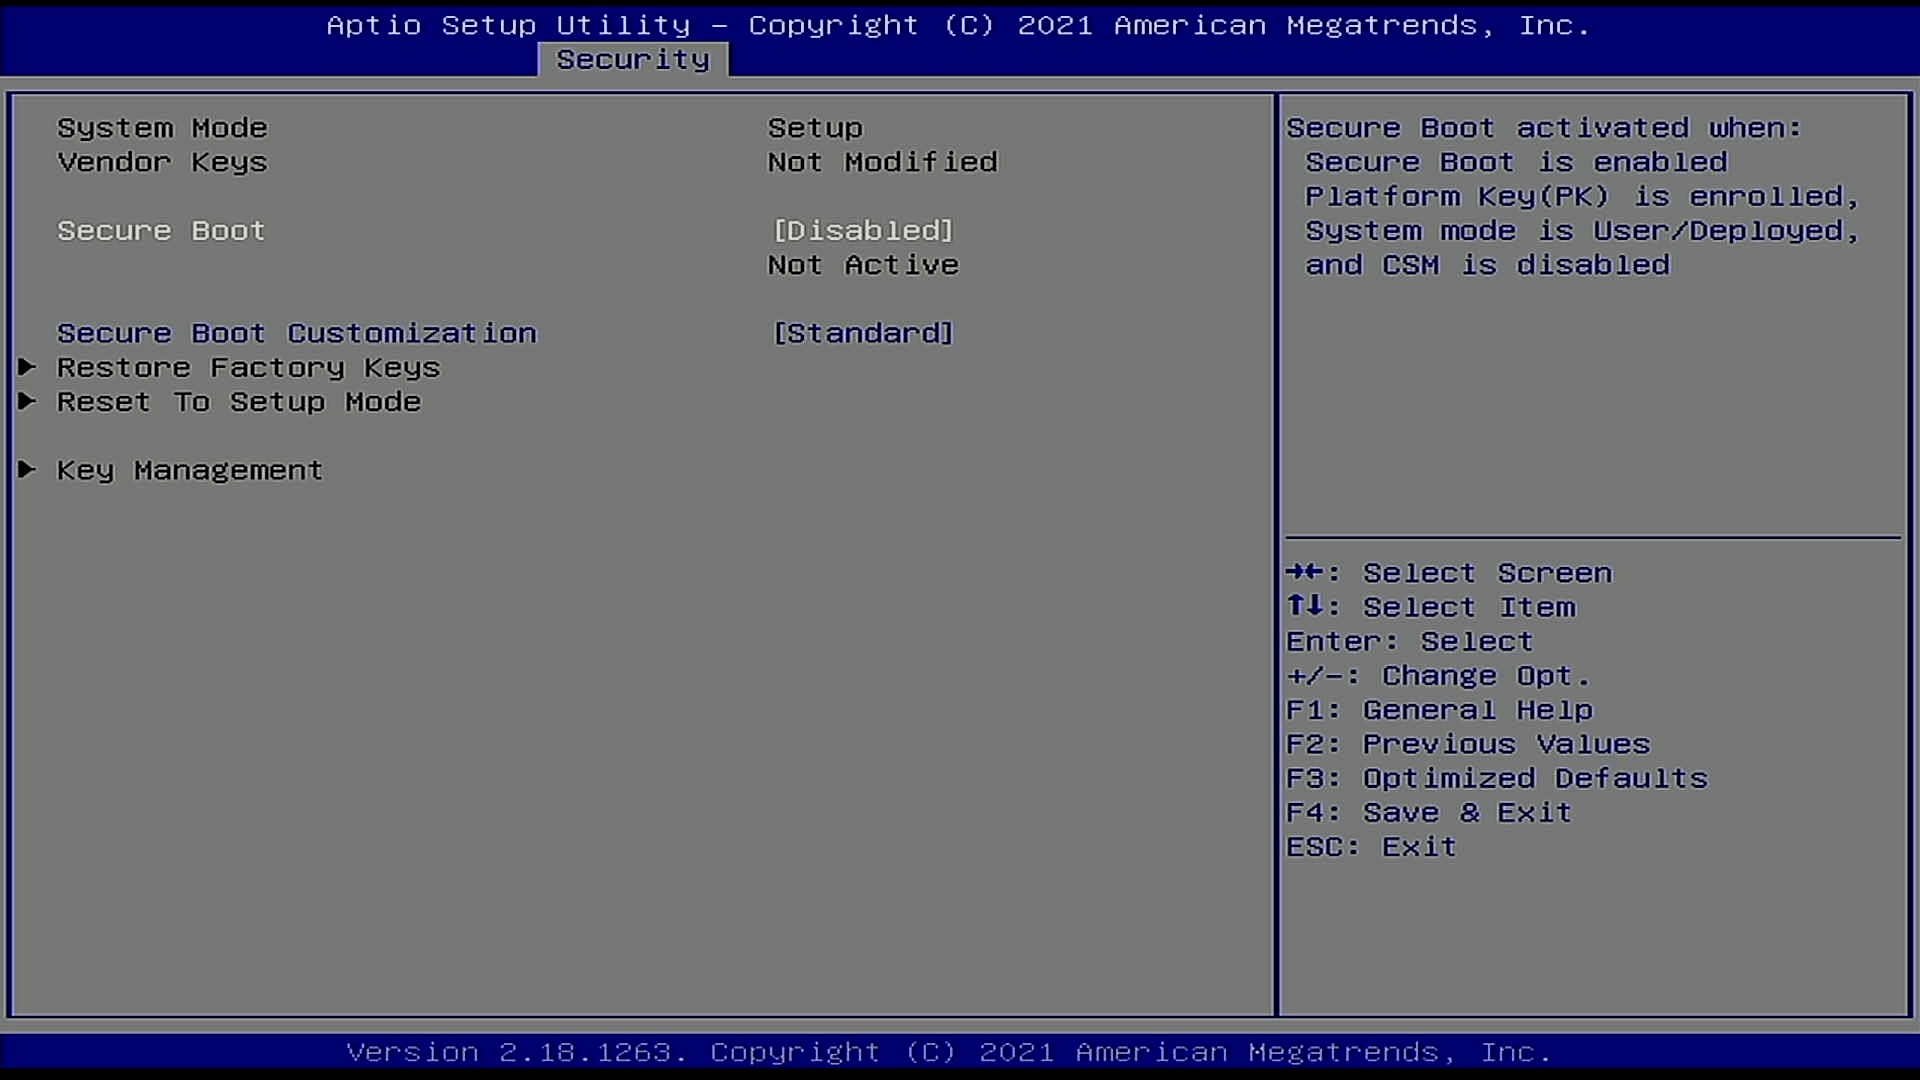
Switch to the "Security" tab of the Fitlet2 BIOS and select "Disabled" for the Secure Boot option.
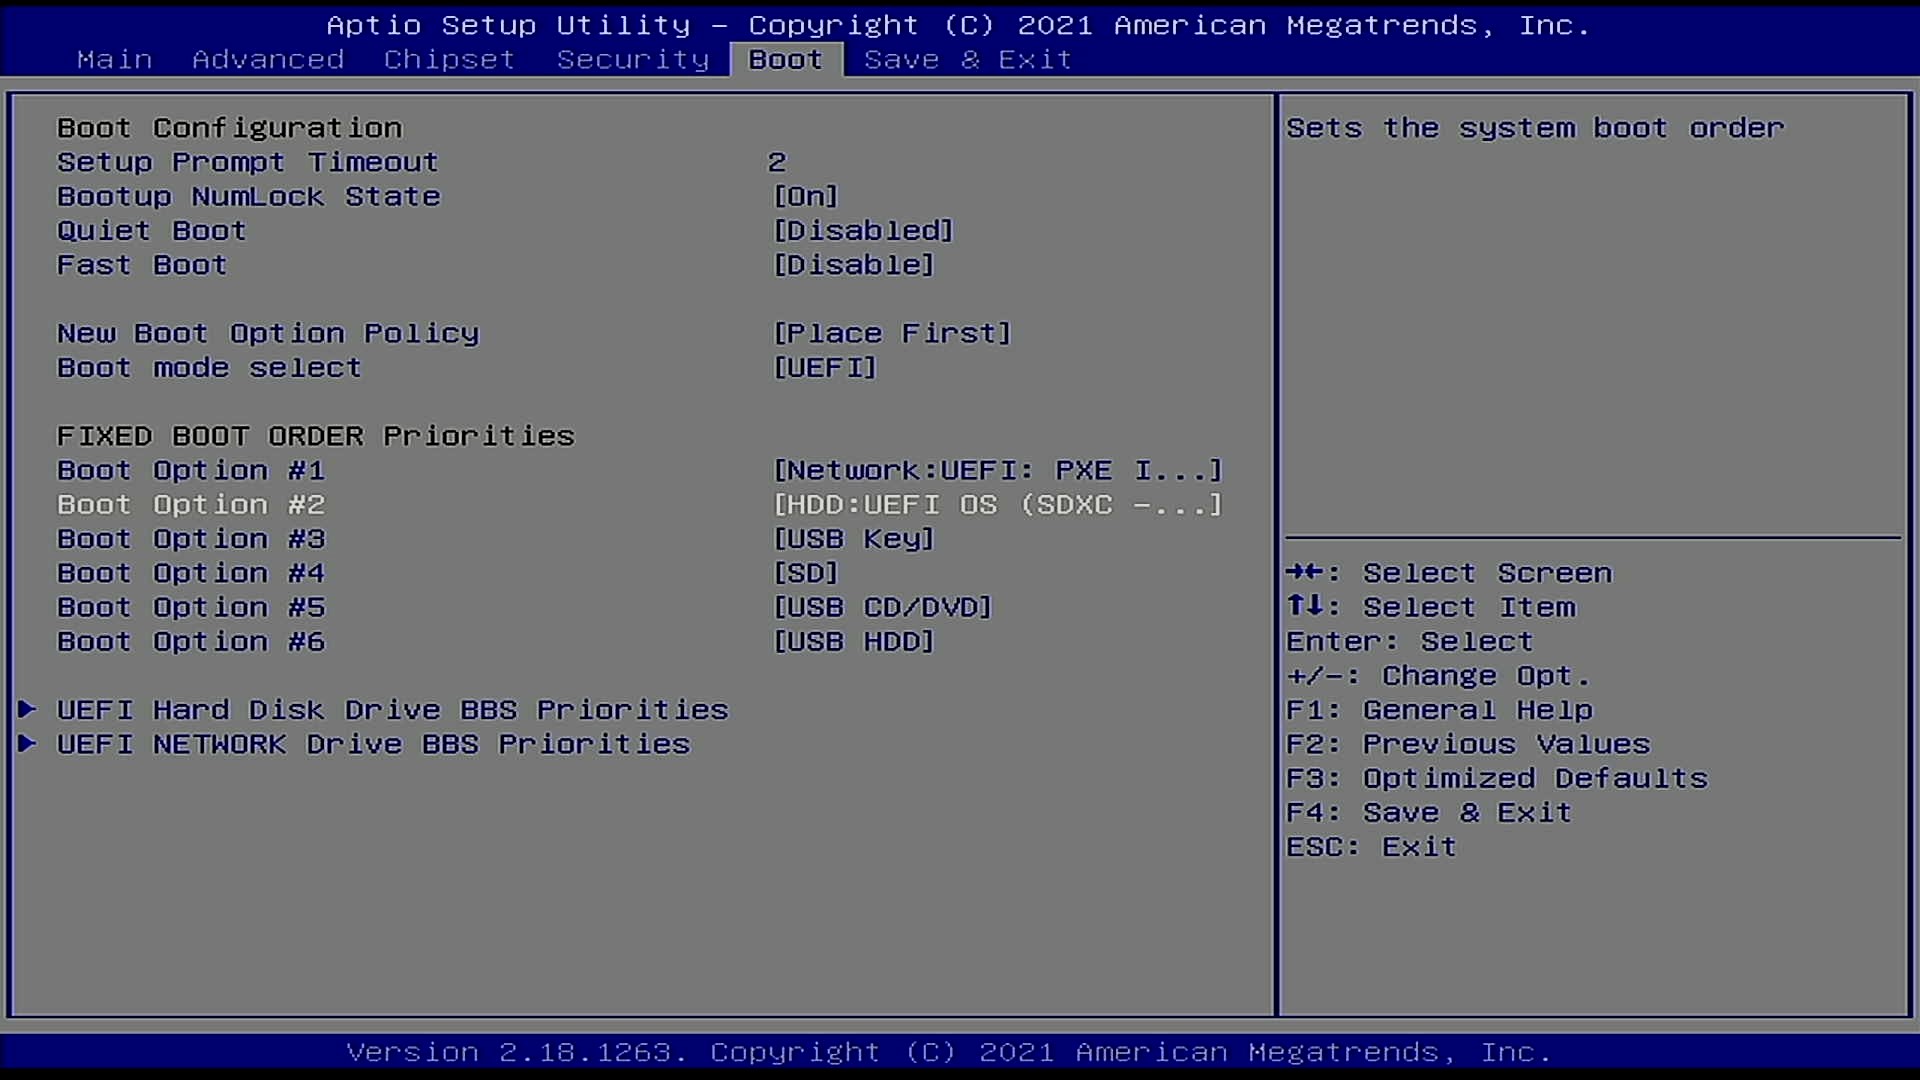
Switch to the "Boot" tab of the Fitlet2 BIOS and Adjust the boot order to boot “HDD” (not SD) first and then “USB Key” and “USB CD/DVD”.
After the Installation your OS will appear as First UEFI HDD.
If your system does not correctly boot into RHEL gor Edge after the Installation, please come back into the system BIOS and correct the Boot Order accordingly.
You can download a Red Hat Boot ISO image from the Red Hat Customer Portal.
The Red Hat Boot ISO image is used to launch the RHEL installer.
The installer fetches the Kickstart file that you provide for installing RHEL for Edge images.
Open a browser and access https://access.redhat.com/downloads.
Click the Red Hat Enterprise Linux 8.
Click the button Download Now for the option "Red Hat Enterprise Linux 8.x Boot ISO" (8.4 at the time of this article).
For more information about downloading Boot.iso image, see Downloading the installation ISO image.
Time to flash the downloaded ISO image on a USB drive. The minimum space required for the UDB Flash drive is 1Gb.
On a side note, please keep in mind the partition resultant from the flash operation will be marked as read-only, as the ISO image we are about to flash is a DVD image.
Let’s check the path of the device with
sudo fdisk -lYou need to identify the path of type /dev/sdN, in my case is /dev/sda if yours takes another path, replace it in the next step.
To start the flashing process type
dd if=rhel-8.4-x86_64-boot.iso of=<devicename> status=progressas root.
WARNING make absolutely sure, that the given device name is in fact the USB-Stick. If you accidentally type in your root-disk, it’ll be overwritten!
On Windows, use the free tool Rufus to create a bootable USB-Stick.
Connect a Keyboard and a Monitor (HDMI) to the Fitlet2 Device.
Put the bootable USB-Key and a blank Micro-SD-Card into the Fitlet2.
Connect a Network Cable. Setup using WiFi is not supported at this time.
WARNING The Micro SD-card will be overwritten by the installation process without further warning!
Turn on the Fitlet2.
If it does not boot from the USB-Key, enter the BIOS-Setup and check for the following settings:
Turn OFF secure Boot.
Change the Boot order, that the USB-Stick comes first followed by "SD" and "HDD".
Once the System boots from the USB-Stick, you’ll see the RHEL-8-Install Prompt.
On BIOS-based systems: Press the Tab key and add custom boot options to the command line. You can also access the boot: prompt by pressing the Esc key but no required boot options are preset. In this scenario, you must always specify the Linux option before using any other boot options.
On UEFI-based systems: Press the e key and add custom boot options to the command line. When ready press Ctrl+X to boot the modified option.
Once you’ve got access to the boot options and kernel parameters for the boot process, appent the following key-value pair to the first row:
inst.ks=https://edge:qiotH4ckf3st@repo8.rhepds.com/edge/kick.ksIn case you get an SSL-failure whan the installation process is trying to download the kickstart file, also append the following kernel parameter:
inst.noverifysslWARNING Keep in mind that the system will use an US-Keyboard-Layout at this stage. This will point to our provided Kickstart File and the Internet based repository.
If you chose to set up your own Deployment Server and use your own Kickstart-File, point to that.
How you create your Own Edge Repository and make that available on an HTTP-Server is documented here.
If your Network does not have a DHCP-Server to automatically supply an IP-Address to the Fitlet, refer to this document on how to provide a manual IP-Address, DNS and Gateway-Information for the Networked Install.
The Fitlet will then run through the automated Install process and reboot at the end. Depending on your Internet-Speed, this will take a couple of minutes (the Process will Download 900 MB).
Once the System reboots, you can remove the USB Stick.
Once the system is up and running you can log into the local console using user root or user edge with the password r3dh4t1!.
WARNING The default Keyboard-Layout will be US. You can change it to your local Layout at this point. See here.
Change the passwords for both users as soon as possible to something secure.
Note down the IP-Address & Name of the System. Again, if you do not have a DHCP-Server in your Network, you need to manually configure the Network.
At this point you also can set up a WiFi-Connection on the Commandline and use it from here on after instead of the cabled Network.
How to set up a static Network on the command line is documented here.
How to set up a WiFi-Connection on the command line is documented here.
If you changed your Network Settings, please reboot now.
Once your Fitlet2 is up and Networked, you can also SSH into the system using user "root" or User "edge".
In addition, the Web-Management-Tool Cockpit is available.
Open a browser and point it to: "https://<fitlet IP or FQDN>:9090"
Log In as root or edge to manage the Device.